Set up your first communicator
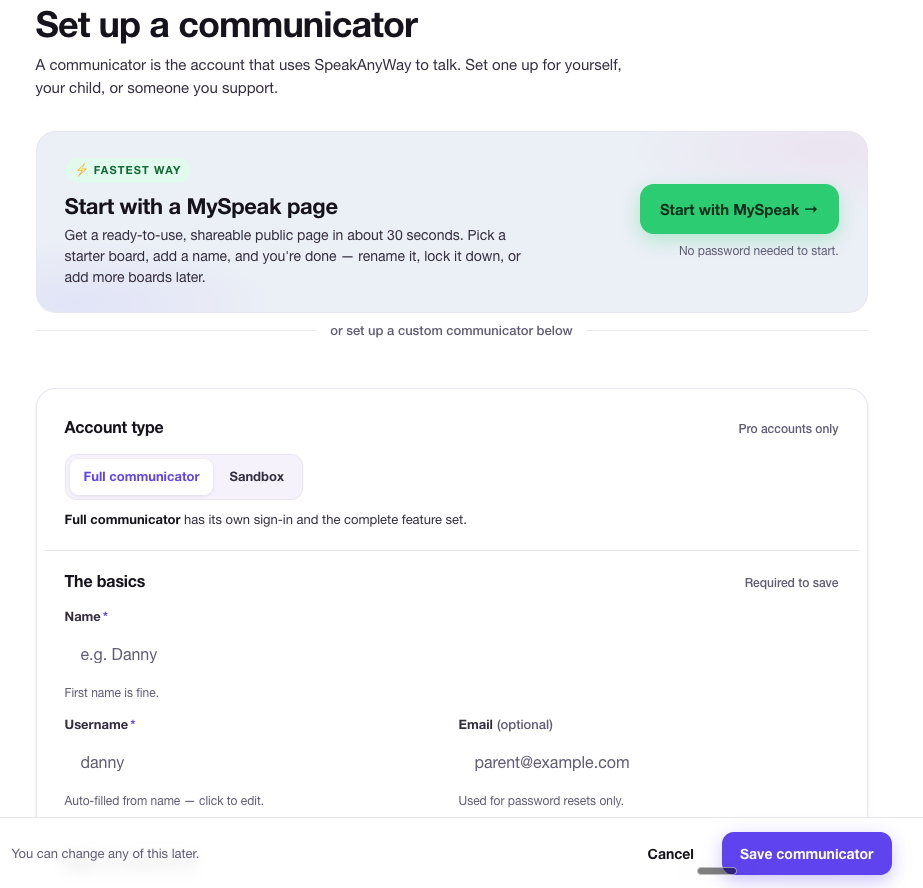
This walks you through adding a communicator from start to finish — about a minute with the custom form, or a few guided steps to build a full MySpeak page you can share right away.
What you'll need
- A SpeakAnyWay account (free works)
- A name to use for the communicator — first name or nickname, doesn't have to be legal
- (Optional) a photo if you want to add one
Option A — Quick start with MySpeak
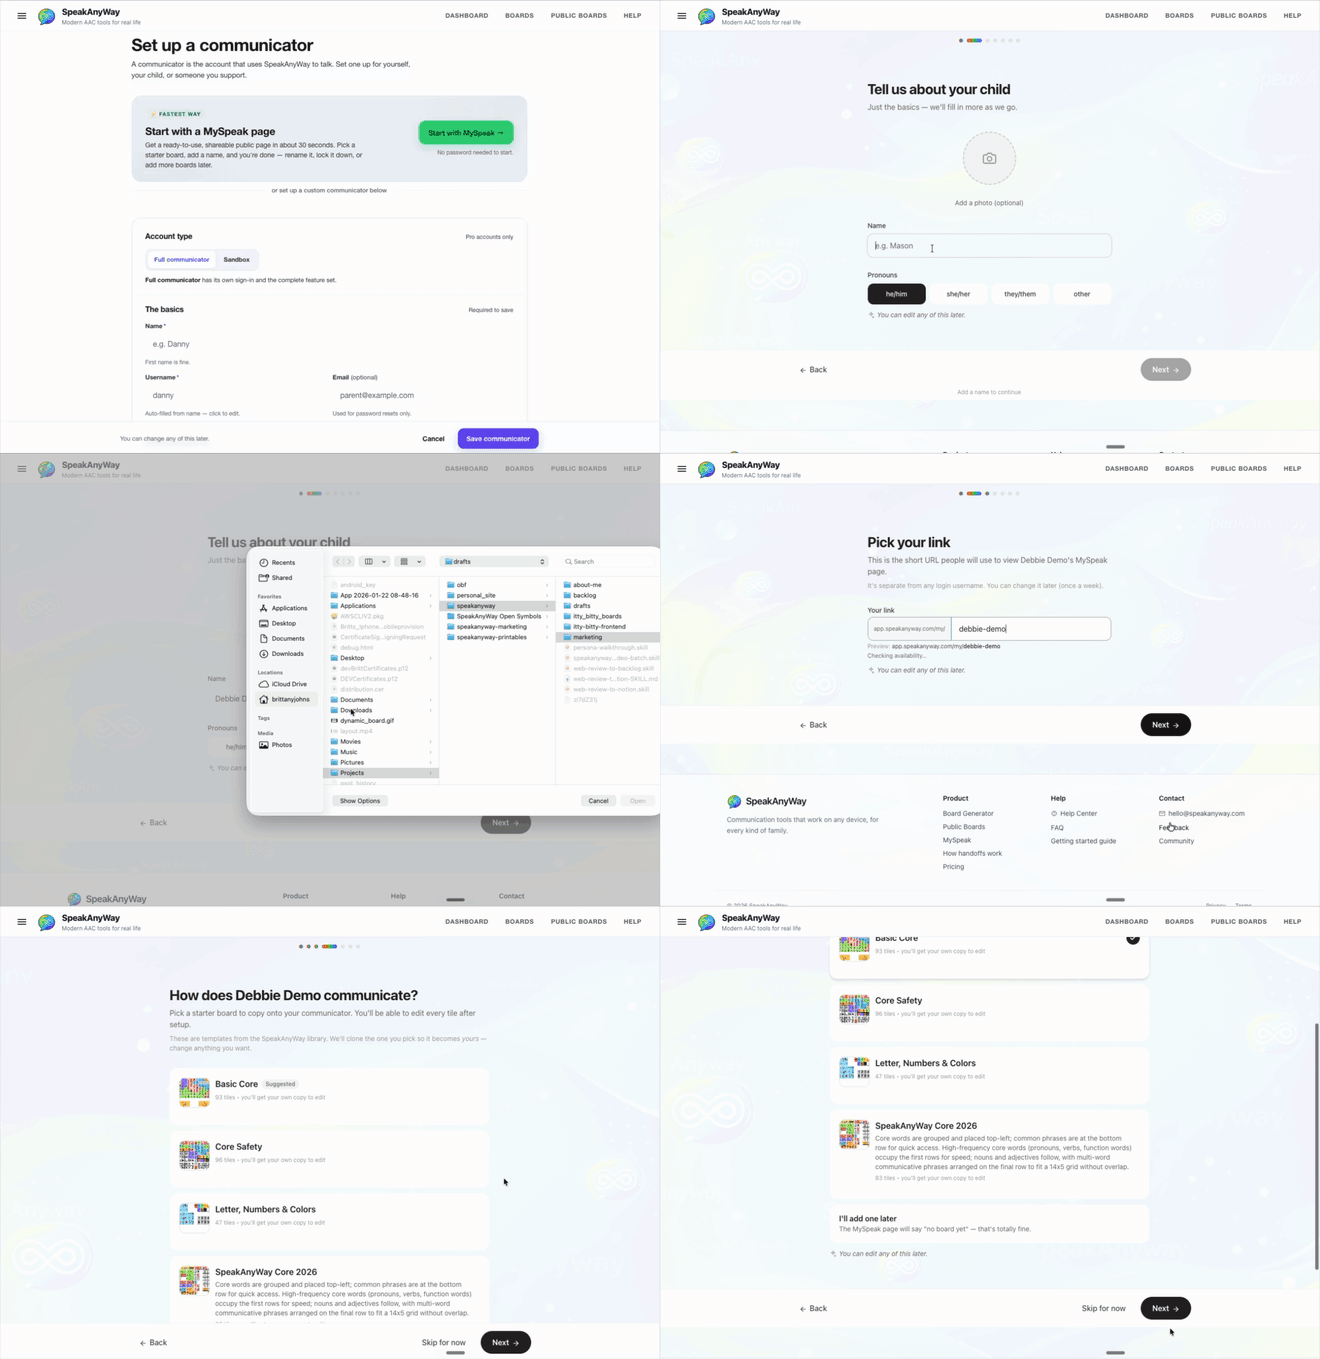
Start with MySpeak builds a MySpeak page — a shareable, scannable page (with its own QR code) that introduces your communicator and assigns a starter board at the same time. Its link is created for you automatically — short and secure, so there's nothing to pick. It's the fastest way to something you can hand to a teacher, a grandparent, or a babysitter today. A short guided wizard walks you through it, with a progress bar across the top.
- From the side nav, click Add Communicator (or Communicators → New communicator) to reach the Set up a communicator page.
- At the top, in the Start with a MySpeak page card (marked ⚡ Fastest way), click the green Start with MySpeak → button. No password needed to start.
- Work through the guided steps:
- Tell us about your child — a name, plus a photo if you'd like one.
- How does your child communicate? — pick a starter board to copy onto the communicator. You can also choose Build a custom board or I'll add one later.
- What should someone know about your child? — short, plain care notes a stranger could use to help. Optional — skip it if you'd rather.
- Who should be called? — add one to three emergency contacts.
- Preview the page, then finish. You'll land on a ready-to-share page with a QR code — print it, stick it on a backpack, or just share the link.
The communicator is created, the starter board (if you picked one) is assigned, and the page is live. Rename it, swap the board, or edit any of it later.
Option B — Custom setup (full control)
If you want to pick the voice up front, set display preferences, or set up a passcode right away, use the custom form instead.
- From the side nav, click Add Communicator (or Communicators → New communicator) to reach the Set up a communicator page.
- Skip the green Start with MySpeak → button at the top. Scroll to the form below it.
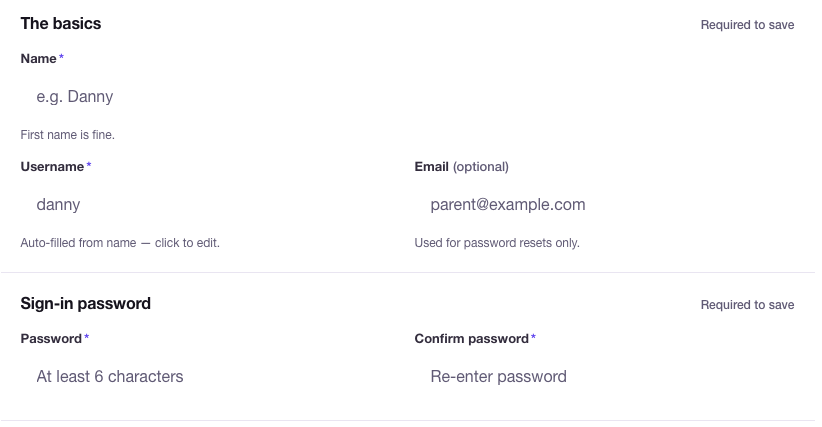
- Fill in The basics:
- Name — first name or nickname.
- Username — auto-fills from the name. Click to edit if you want something different. This is what they'd use to sign in.
- Email (optional) — for password resets only. Skip if you'd rather.
- (Paid plans only) Set a Passcode and Confirm passcode in the Sign-in passcode section. This is the communicator's own sign-in, separate from yours. (Sandbox accounts don't have one.)
- (Optional) Click Optional profile details to add age, gender, or an AAC profile — AAC level, Vocabulary focus, and Age band. Nothing's public. Age and gender just help you keep track if you have several communicators; the AAC profile does a bit more — when you build boards with the Board builder, SpeakAnyWay uses it to suggest a starting point (you'll see a Recommended for [name] tag on the template that fits). Every field is optional, Not set is fine, and you can change them anytime from the communicator's edit page.
- (Optional) Click Images that look like them to set skin tone, hair, and things like glasses or a wheelchair. When SpeakAnyWay draws a new image of a person for their boards, it draws them to look like your communicator. None of it is shown on their public page.
- (Optional) Click Advanced settings to pick a speaking voice, change display preferences, or set dashboard layout columns. The defaults are fine — only open this if you have a reason to.
- Click Save communicator in the bottom action bar.
Tip: You can leave Advanced settings closed and come back to them later from the communicator's edit page. The default voice and layout work well for most people.
What to expect
- Once you save, you land on the communicator's detail page. From here you can assign boards, change settings, or generate a sign-in QR code.
- New communicator = no boards yet (unless you used MySpeak). Click Assign a board to pick one from your dashboard, or generate a new board from scratch.
- The communicator card appears on your main dashboard alongside any others you've set up.
Pro account types: Full vs Sandbox
On a Pro plan, the form shows an extra Account type toggle at the top:
- Full communicator — has its own sign-in. Most parents pick this.
- Sandbox — no login. Plan boards before lending the account to a family. Promote to full later.
On Free and Basic plans the toggle is hidden, and the two plans behave differently underneath: on Basic, a communicator you create is a full one with its own sign-in; on Free, a communicator you create for yourself is a sandbox with no sign-in. The one Free account that does get a sign-in is a communicator a pro hands to you — see Lend or claim a communicator.

Common questions
- Can I create multiple communicators at once? Not in one shot — set them up one at a time. Each gets its own boards and voice.
- I clicked Save and got an error about my plan limit. You've used every communicator slot on your plan, so you'll see a card with your options. On Pro or Clinician you can lend one to a family or archive someone you're not supporting right now. On Free or Pro you can still set up a sandbox (no sign-in, doesn't use a slot). You can also upgrade, or email hello@speakanyway.com. See Plans and slot limits.
- The communicator I just made has no boards. What now? Open the communicator and tap + Add boards to pick boards you already have, or Build a board set to make new ones.
- I want to change the username later. Open the communicator and go to the Settings tab — you can change the username any time. Usernames are unique across SpeakAnyWay, and they'll sign in with the new one.